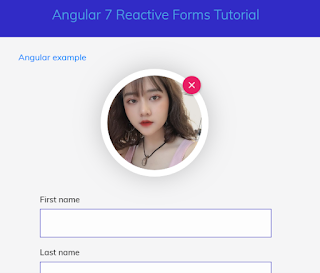
In this Angular tutorial, I am going to create an advance form using Angular 7|8|9 Reactive Form with ReactiveFormsModule API from scratch. I will go through the common concepts of Angular Reactive Forms like FormGroup, FormControl, FormBuilder, and FormaArray to manage user’s input data.

Reactive forms In Angular follows model-driven approach to handle form data. Reactive forms Angular offer more flexibility then template driven forms. Initially Reactive Form is complicated but once you are familiar with Reactive Forms, then you can easily manage the complex data.
By the end of this tutorial, you will be able to do:
- Inject ReactiveFormsModule API in Angular 7
- Set up the Reactive Forms in Angular 7|8|9
- Bind user data to FormGroup API using Reactive Forms in Angular 7
- Upload the image in Angular 7|8|9 using Reactive Forms & HTML5 FileReader API
- Create dynamic form fields using Angular 7|8|9 FormArray service
- Validate Form in Angular 7|8 using Reactive Form’s Validators service
- Work with select dropdown in Angular 7/8/9
- Work with Radio buttons in Angular
- Create custom validator to confirm password validation
Step 1: Importing ReactiveFormsModule API
In order to work with Reactive Forms in Angular 7|8 we must import ReactiveFormsModule API in app module file.
app.module.ts
import { ReactiveFormsModule } from '@angular/forms';Step 2: Setting Up formGroup, ngSubmit & formControlName in Angular Form Template.
@NgModule({
imports: [
ReactiveFormsModule
],
})
export class AppModule { }
Reactive forms communicate with component class in Angular to manage the form data. Let’s understand the Reactive Forms services & ngSubmit event:
AbstractControl: This is the main class for controlling the behavior and properties of, FormGroup, FormControl, and FormArray.
FormBuilder: It provides helpful methods to create control instances in Angular 7 Reactive Forms.
FormGroup: FormGroup is a top-level API which maintains the values, properties and validation state of a group of AbstractControl instance in Angular 7.
FormControl: It communicates with an HTML Form element like input or select tag, this api handles the individual form value and validation state.
FormArray: FormArray API maintains the values, properties and validation state of an array of the AbstractControl instances.
ngSubmit: This event is called when the form is submitted.
<form [formGroup]="registrationForm" (ngSubmit)="onSubmit()" novalidate>Step 3: Using FormBuilder API
<input formControlName="firstName" placeholder="Your name">
<input formControlName="email" placeholder="Your email">
<input formControlName="phoneNumber" placeholder="Your message">
<button type="submit">Register</button>
</form>
The FormBuilder service offers 3 useful methods: group(), control(), and array(). These methods generate instances in your component classes including form controls, form groups, and form arrays.
import { Component } from '@angular/core';Step 4: Upload Image Using Reactive Forms & HTML5 FileReader API in Angular
import { FormBuilder, FormArray } from "@angular/forms";
@Component({
selector: 'app-root',
templateUrl: './app.component.html',
styleUrls: ['./app.component.css']
})
export class AppComponent {
constructor(public fb: FormBuilder) {}
registrationForm = this.fb.group({
file: [null],
fullName: this.fb.group({
firstName: [''],
lastName: ['']
}),
email: [''],
phoneNumber: [''],
address: this.fb.group({
street: [''],
city: [''],
cityName: ['']
}),
gender: [''],
PasswordValidation: this.fb.group({
password: [''],
confirmPassword: ['']
}),
addDynamicElement: this.fb.array([])
})
}
Let’s create a file upload functionality using Reactive Forms in Angular 7|8|9.
I am going to use HTML5 FileReader, changeDetectorRef, @ViewChild() API’s.
HTML5 FileReader API: This API is very useful to upload images and files from the client side in the web browser. Here is the detailed article about HTML5 FileReader API.
changeDetectorRef: If there is a change in the app, Angular will perform ChangeDetectorRef on all the components, whether it is a network request or user event. Understand Angular 7 change detection strategy
@ViewChild(): If you wish to gain access to a DOM element, directive or component from a parent component class then you rely on Angular 7 ViewChild. Read more about Angular 7 ViewChild.
app.component.html
<div class="avatar-upload">app.component.ts
<div class="avatar-edit">
<input type='file' id="imageUpload" accept=".png, .jpg, .jpeg" #fileInput (change)="uploadFile($event)" />
<label for="imageUpload" *ngIf="editFile" [ngClass]="['custom-label', 'upload-image']"></label>
<label *ngIf="removeUpload" [ngClass]="['custom-label', 'remove-image']" (click)="removeUploadedFile()"></label>
</div>
<div class="avatar-preview">
<div id="imagePreview" [style.backgroundImage]="'url('+ imageUrl +')'">
</div>
</div>
</div>
import { Component, ChangeDetectorRef, ElementRef, ViewChild } from '@angular/core';Demo Angular Reactive forms validation online:
import { FormBuilder, FormArray } from "@angular/forms";
@Component({
selector: 'app-root',
templateUrl: './app.component.html',
styleUrls: ['./app.component.css']
})
export class AppComponent {
constructor(
public fb: FormBuilder,
private cd: ChangeDetectorRef
) {}
registrationForm = this.fb.group({
file: [null]
})
@ViewChild('fileInput') el: ElementRef;
imageUrl: any = '/assets/dummy-user.jpg';
editFile: boolean = true;
removeUpload: boolean = false;
uploadFile(event) {
let reader = new FileReader(); // HTML5 FileReader API
let file = event.target.files[0];
if (event.target.files && event.target.files[0]) {
reader.readAsDataURL(file);
reader.onload = () => {
this.imageUrl = reader.result;
this.registrationForm.patchValue({
file: reader.result
});
this.editFile = false;
this.removeUpload = true;
}
this.cd.markForCheck();
}
}
removeUploadedFile() {
let newFileList = Array.from(this.el.nativeElement.files);
this.imageUrl = '/assets/dummy-user.jpg';
this.editFile = true;
this.removeUpload = false;
this.registrationForm.patchValue({
file: [null]
});
}
}


Nice articel, This article help me very well. Thank you. Also please check my article on my site about What Is Angular?.
ReplyDelete