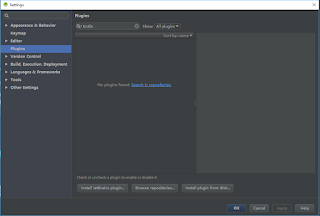
Install the Kotlin plugin
Android Studio will install the Kotlin plugin from the 3.0 (preview) version.
Open the Settings (Mac is Preferences) panel, find the Plugins option on the right (shortcut Ctrl+, command+ under Mac), type "Kotlin" in the search box, click Search in repositories, then install, install You will need to restart Android Studio after you finish.


Create a new project
Select Start a new Android Studio project or File | New project, most of the options have default values, just press the "Enter" button a few times.

Android Studio 3.0 provides the option to enable Kotlin support in the current dialog. If checked, you can skip the step of "Configuring Kotlin in the project".
Select the Android version:

Select the Activity style you need to create

Name the activity:

In Android Studio 3.0, you can choose to create an activity using Kotlin, so there is no need to "convert Java code to Kotlin (Converting Java code to Kotlin)".
In earlier versions, the activity was created using Java and then converted using the automatic conversion tool.
Convert Java code to Kotlin
Re-open Android Studio, create a new Android project, add a default MainActivity
Open the MainActivity.java file and call Code | Convert Java File to Kotlin File from the menu bar.

Once the conversion is complete, you can see the activity written in Kotlin.

Kotlin in the project
When you start editing this file, Android Studio will prompt you that the current project has not been configured with Kotlin, you can complete the operation as prompted, or you can select Tools in the menu bar.


No comments:
Post a Comment